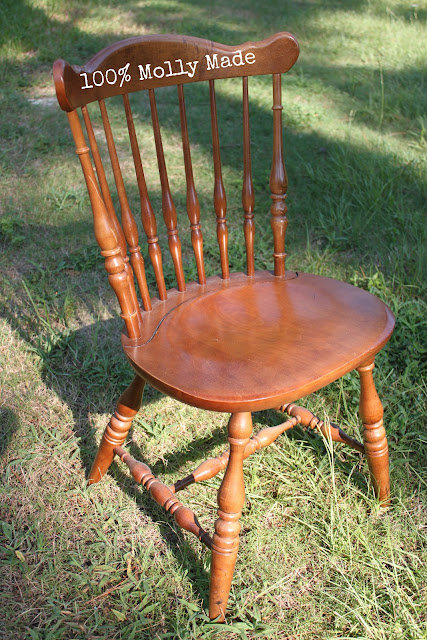
This maple wood chair was given to me from my Mom, she purchased 3 of these chairs at a garage sale several weeks ago. My Mom redone 2 of the chairs and they look beautiful now!! The first one she redone was a Sweet Hand Painted Yellow Chair and the other one was a Shabby Chic Chair, after seeing how well her chairs turned out I was extremely anxious to start redoing my own. :)
I wasn't quite sure what I was going to do with this chair, I knew for starters I had to sand it down pretty well. By the time I finished sanding it I knew what I was going to do with this awesome maple wood chair.
Something More
Whew!! Sanding down this chair took like 3-4 hours, I had plenty of time to think about what I was going to do with this chair. I kinda had this list in my head:
White
Distressed
Black Detail
Something More...
Didn't quite know what the "Something More" was, but I knew it'd be blah if I had just made it white with black details. Anywho, Moving on.
For the distressed look I was going for I figured I should make a black glaze to go under my white paint, so that when I scuffed up my white paint the black would be revealed. I made the black glaze by mixing up a few different paints together.
 | |
| 1st Coat Of Black Glaze |
 |
| 2nd Coat Of Black Glaze |
 |
| I've Now Painted White Over The Black Coat |
 |
| Black Detailing |
Something More, Something More.?. Yep, I found it, A pretty little bird to add some life and color to this nice chair.
 |
| Stenciled Bird |
 |
| Lovely Hand Painted Bird |
I Really Like How I Put A Feather Texture On The Bird's Chest
 |
| Ooo I Love This :) |
Ohh how I love this, it's so neat to have the year on this baby and my blog name as well!! (I used a pen to write the % sign)
I assumed this chair would be finished by now, white distressed chair, black detailing, an awesome bird and personal paint on the bottom. I still felt it needed, well... "Something More"
STOP
q-tip, or shall I say quick tip:
If you accidentally smudge your paint you can use fingernail polish remover and a q-tip to fix it, I had a few places on my chair I had to touch up.
 |
| Ta Da!! |
I was satisfied, I had my "Something More". It was very appropriate, a sweet little bird, and "I'll Fly Away Oh Glory"
I still wanted some color on the back of the chair though.
 |
| Yes, I Used A Toothpick. |
For Some Reason I Really Like That Random Yellow Sweet Gum Leaf.
I'll Fly Away Oh Glory!
This chair turned out a lot better than I thought it would, I'm so happy. The bird is beautiful, the white is simple and the saying is well... Something more.
Made With Something More,
Danimo
Parties I Will Be Joining:
Monday:
Tuesday:
Wednesday:
Thursday:
Friday:
Saturday:


Love the chair Molly and especially love the saying that you put on the on the back of it. Very pretty!
ReplyDeleteLove you,
Your Mama
Simply cool - I love the song reference too!
ReplyDeletePerfect!
I would love if you came by my party happening now to link it up!
Stacey of Embracing Change
Great job, Molly.
ReplyDeleteI also really like your number canvas! very cool.
Deb@LakeGirlPaints
Hopping over from your creative mamas blog. You are so very talented and creative. Love your blog. Following you and adding comments to encourage you to display your creativity more. I am a new blogger too .. So do visit me on my blog - http://thehobbyharbor.blogspot.com (Hugs)
ReplyDeleteYou did a great job! I love the tutorial too!
ReplyDeleteHave a great day.
Pam
You are amazing girl. I love your chair makeover. THanks for sharing.
ReplyDeleteI love the chair! The colors all work so well together.
ReplyDeleteSharon
Nicely done--that was quite a project! I especially like the words on the back.
ReplyDeleteWow! This is beautiful!!
ReplyDeleteLove the saying--- I have a lot of old fold up chairs. I think I now know what to do! You have stole my heart.
ReplyDeleteGreat job! Thanks for joining Creative Bloggers' Party & Hop :)
ReplyDelete